Complete component walkthrough
Watch the WhisperFit Unboxing
I show how the pieces relate before the overhead work begins. Watch the complete unboxing, then use the checks below to evaluate your own bathroom.
What the pieces do
In this walkthrough, I discuss the fan-only WhisperFit DC FV-0511VF1 and the FV-0511VFL1 with a main light and nightlight. The lighting and control choices differ. Check the parts list for your exact model; this overview is not a promise that every WhisperFit box contains identical pieces.
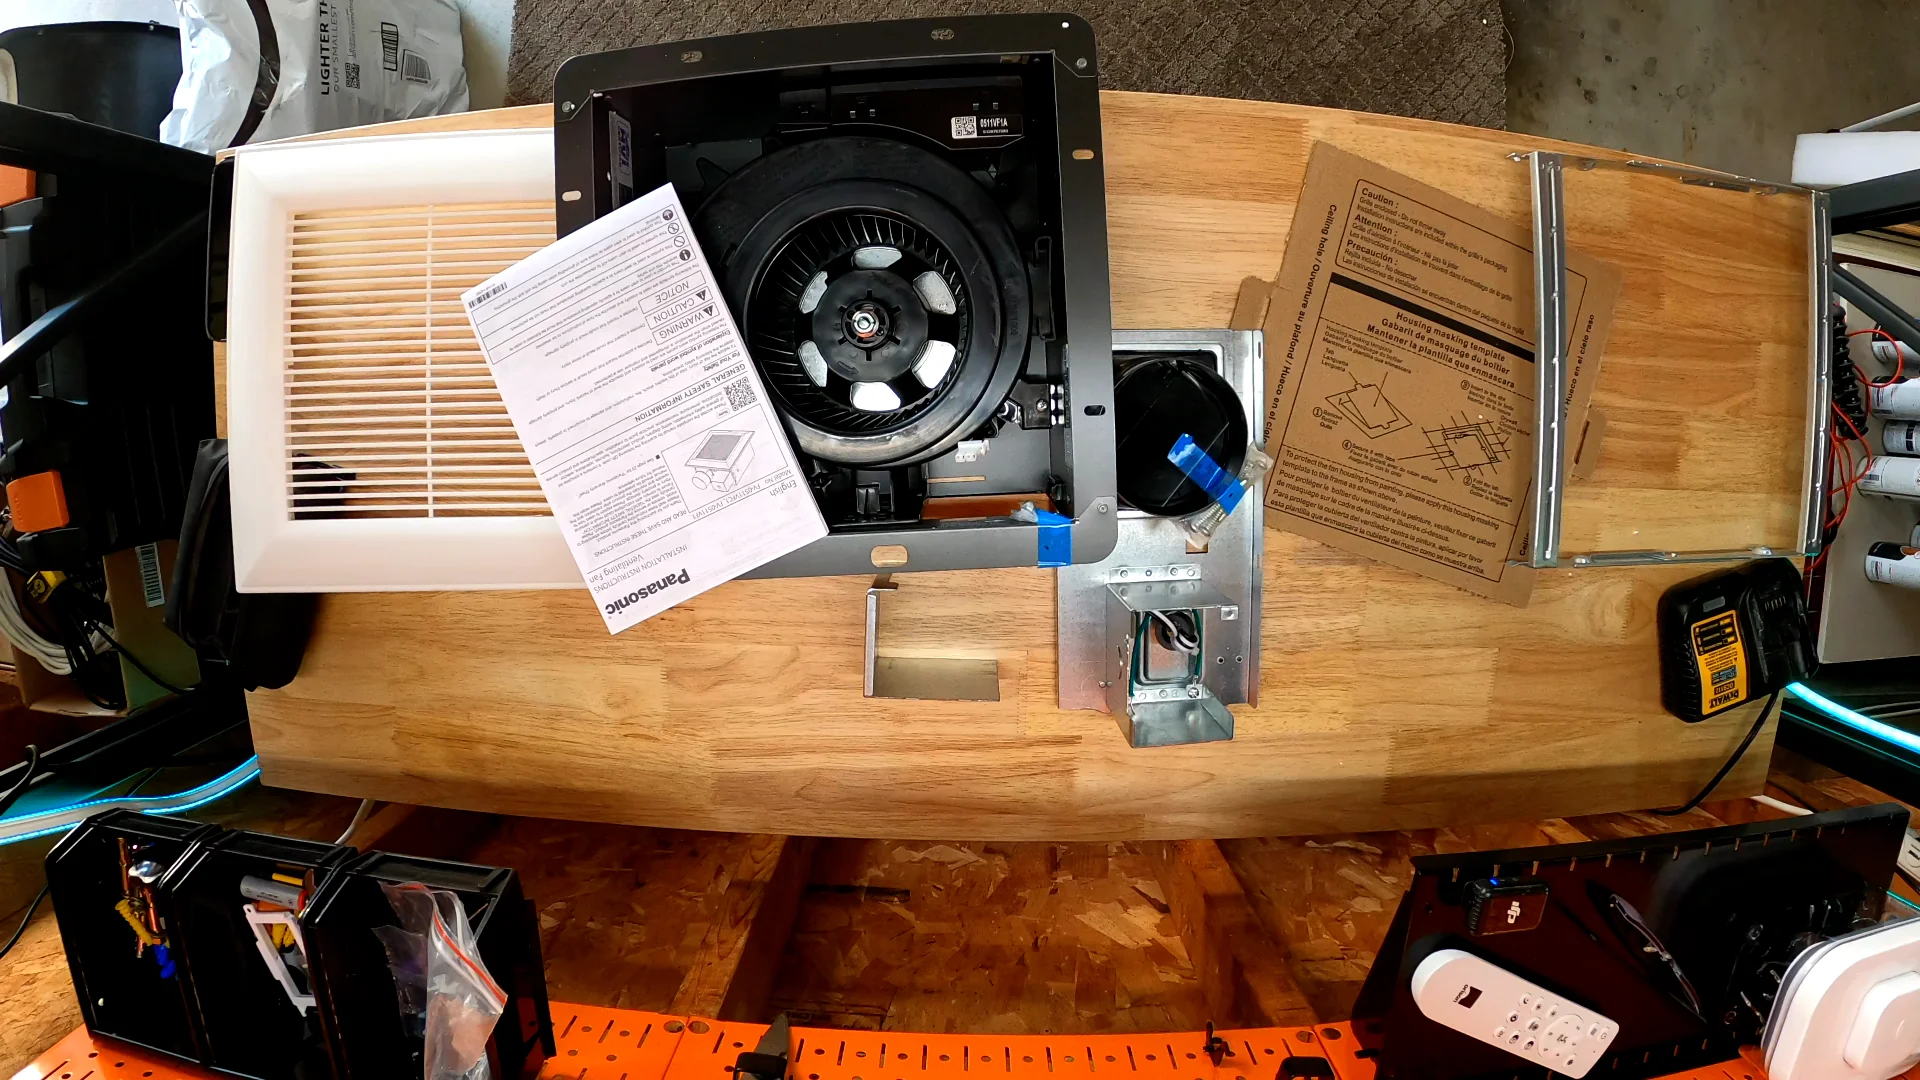
I separate the loose pieces from the features already built into an assembly. The selector and damper have jobs of their own, but they are not extra boxes to install.
Flex-Z Fast Bracket
This is the support at the ceiling framing. I want you to understand its position and tabs before you are holding parts overhead.
Ceiling template
The cardboard template marks the housing opening. It cannot tell you where a joist, wire, or other obstruction will interfere with that cut.
Duct/electrical assembly
This separate section handles the duct connection and electrical compartment. Recognizing it helps you see why all the connections do not have to be made while holding the entire fan.
Motor housing
This assembly joins the duct/electrical section. Look at how the pieces meet and come apart while you can still turn them around in your hands.
Grille and springs
The grille is the visible bathroom-side cover. Its springs attach to slots in the motor housing. Check both that connection and whether the grille will cover the old opening.
Duct adapter
The smaller adapter discussed in the video provides a way to connect to existing 3-inch duct. A physical connection alone says nothing about the condition of the rest of that run.
Airflow selector
The built-in selector lets you choose 50, 80, or 110 CFM on these models. It sets an airflow request; it does not display a measurement of the finished installation.
Backdraft damper
The moving flap in the duct connection helps limit backward airflow when the fan is off. I still check what happens at the exterior end of the duct.
Supplied hardware
Lay out the screws and match them to the instructions. You want to know which connection each fastener belongs to before you are on the ladder.
Why the fan comes apart
The relationship I want you to recognize is bracket → duct/electrical assembly → motor housing → grille. The bracket establishes the support. The next assembly handles the duct and electrical connections. The motor housing joins it, and the grille finishes the bathroom side.
That division gives you smaller assemblies to work with. It also gives you a chance to examine the connections before the ceiling hides your view. This is an orientation to the parts; follow the instructions supplied with your exact fan for installation.
Understand the Flex-Z Fast Bracket and assembly relationships →
Three checks before buying
1. Ceiling: opening, framing, and cover
Before tracing the template, I want to know where the framing is, which direction the duct runs, what could obstruct the cut, and how much slack the existing wiring has. The label “retrofit” describes a replacement-oriented design; it does not make every old opening suitable.
The housing opening and grille coverage are different measurements. A large-looking cover cannot make an incorrectly placed cut work. Check the available space above the drywall as well as what will remain visible below it.
2. Duct: connection and complete path
Look at the existing diameter before removing the old fan. Then trace the route, bends, flex condition, and exterior termination. I do not want you buying a better fan while leaving the restriction that was holding the old one back.
Work through the WhisperFit 3-inch versus 4-inch connection question →
3. Controls: decide what you want to operate
Do you want the fan running after the main light is off? Would you use a nightlight? Do you want to dim the main light? The fan-only and lighted models answer different needs, and the existing conductors and switches must support the arrangement you want.
Understanding the mechanical pieces does not establish that the wiring is suitable. Turn off and verify power before electrical work, follow the exact model's instructions, and involve an electrician if the existing wiring or required changes are unclear.
Selecting airflow and delivering it are different
CFM means cubic feet per minute. The selector gives you an airflow choice; Panasonic describes SmartFlow as helping the motor maintain that selection as duct resistance changes. That is a useful feature, but it is not a reason to ignore the exhaust path.
Turning the switch to 110 does not prove that 110 CFM reaches the grille. I still want an appropriate setting for the bathroom and a duct system that lets the fan do its job. Use the existing model and starting-airflow guide for the sizing decision.
Explore the details
Your next step
Check Whether This Fits Your Bathroom
Check Whether This Fits Your Bathroom
Once the project looks suitable, choose the fan-only or lighted version. To see the work, watch my complete installation and download the visual installation companion. For my recommendation and limitations, read the hands-on review.
Already Know Which Fan You Want?
Panasonic WhisperFit DC
FV-0511VF1
No Integrated Light
Choose this version when you only need ventilation.
See Current Amazon Listing →Panasonic WhisperFit DC
FV-0511VFL1
Light + Nightlight
Choose this version when the ceiling assembly should also provide lighting.
See Current Amazon Listing →The explanations above come from my unboxing and documented installation work. For the lighted FV-0511VFL1, Panasonic's product documentation independently confirms the airflow selections, SmartFlow feature, separate nightlight wiring, and included 3-inch reducer. Manufacturer features are not measurements from this unboxing.