What the smaller adapter actually does
In the WhisperFit configuration I discuss in the unboxing, the smaller adapter provides a physical connection to existing 3-inch duct. For the lighted FV-0511VFL1 documented on this site, Panasonic lists a standard 4-inch connection with an included 3-inch reducer. Check the exact model and its supplied instructions before assuming another Panasonic fan uses the same parts.
That answers whether the parts can connect. It does not establish that the whole duct system will move enough air for your bathroom. Those are two separate decisions.
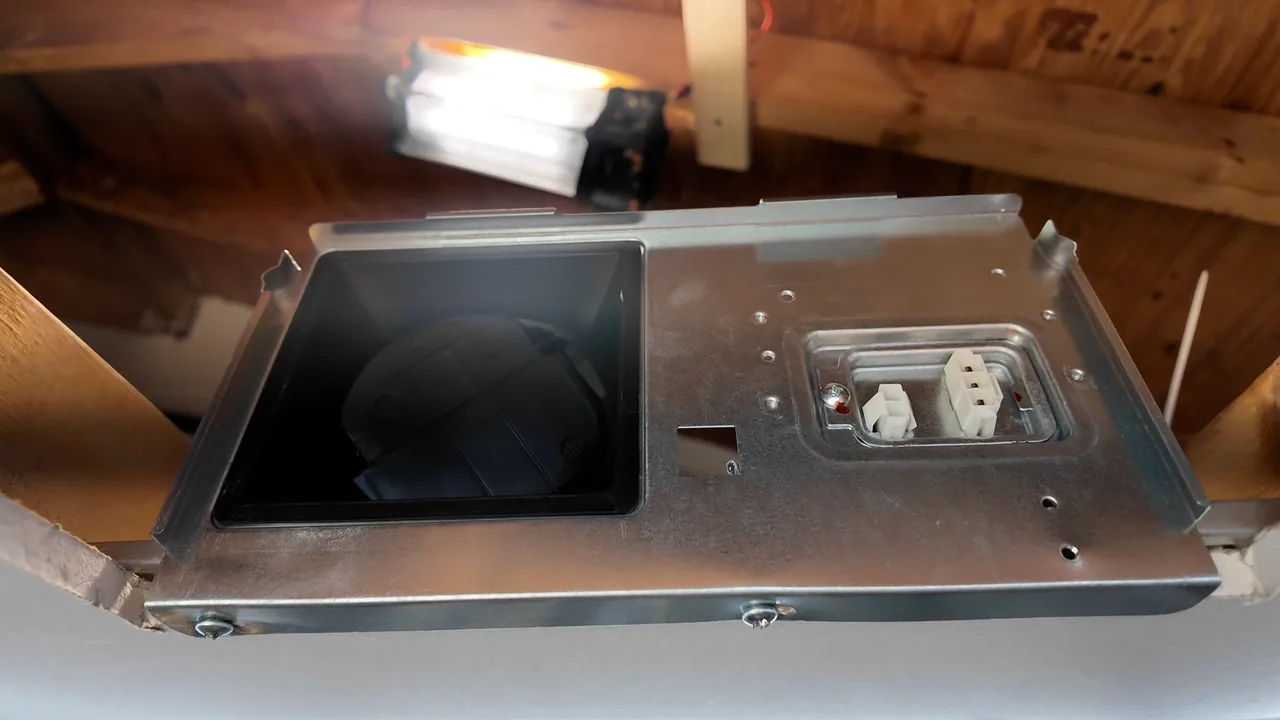
From the unboxing
Watch the 3-inch duct discussion
This is the same complete unboxing, starting at 4:10 for this topic. Playback continues into the following chapters.
A compatible connection is not an airflow result
A smaller duct creates more resistance, especially when you ask the fan to move more air. But diameter is not the entire story. A long run, tight turns, compressed flexible duct, or a problem at the outside vent can add resistance as well.
I would not call every 3-inch duct unusable or every 4-inch duct good. I want to see the route the air actually takes. A larger duct that is crushed or disconnected has not solved the problem simply by having a larger nominal diameter.
The unboxing explains these relationships. It does not measure a percentage loss caused by this adapter or establish a universal duct-length limit.
What you find—and what you still need to establish
| What you find | What you still need to establish |
|---|---|
| A compatible 3-inch connection | Whether the complete duct path is suitable for the bathroom and selected airflow. |
| A long or tightly bent run | Where resistance is accumulating and whether a more direct route is practical. |
| 110 CFM selected | What the installed system actually delivers at the grille. |
| A visible internal damper | Whether the duct remains connected and the exterior end is in good condition. |
Check the path before removing the old fan
Before buying, I want you to identify the existing diameter and the direction the duct leaves the fan. Think about how that connection will line up with the new assembly and what the framing allows.
Then inspect the parts of the run you can access: length, bends, flex compression, connections, and the exterior termination. Finding a flap at the fan does not tell you that the outside vent works or that the duct reaches it. The complete path has to carry the humid air outdoors.
If you uncover a duct problem, include that work in the replacement decision. Otherwise, you may remove a working motor and leave the condition that limited its airflow in place.
The highest setting does not clear a restriction
Turning the selector to 110 CFM changes what you ask the fan to deliver. It does not straighten flex, shorten a long route, or repair an exterior vent. The SmartFlow motor feature also does not remove the need for a suitable duct system.
I choose an appropriate setting for the room and evaluate the exhaust path together. Use the WhisperFit model and airflow guide for the setting question, then verify the completed installation.
Your next step
Check the Complete Duct Path
For the parts around that connection, return to the unboxing overview. When the project is ready, follow the WhisperFit duct-connection installation guidance.